
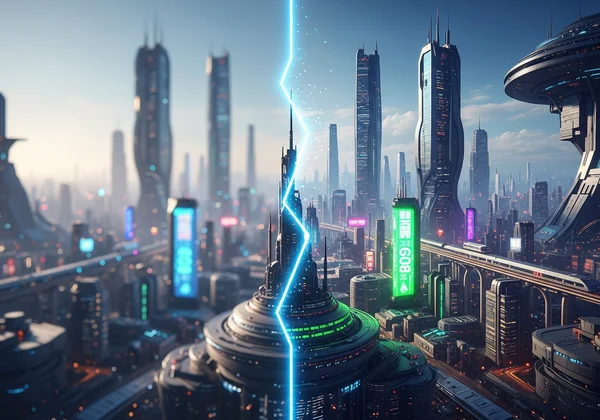
Fix Blurry AI Paintings: 7 Proven Tips for Crisp, High-Quality Art
You’ve spent time crafting the perfect prompt and found a stunning AI art style. The preview looks incredible. But when you download your creation, the details are fuzzy, the edges are soft, and the overall image is disappointingly blurry. This is one of the most common and frustrating issues for digital creators. It can undermine your artistic vision and make your work feel unprofessional.
Why does my AI art look blurry? This is a question many artists, marketers, and enthusiasts ask. The good news is that you can achieve crisp, high-quality results with just a few adjustments to your process. This guide will explain why blurriness happens and provide seven practical, easy-to-follow fixes.
Whether you're a seasoned digital artist or just starting to explore the world of AI art, these tips will help you transform your creations from mediocre to museum-quality. You can apply these principles using any AI painting generator, and we invite you to try our free tool to see the difference for yourself.
Understanding Why AI Art Gets Blurry
Before diving into the fixes, it’s helpful to understand the root causes of blurry AI art. The problem usually stems from two key areas: how the AI processes your image and the quality of the photo you provide in the first place.
How AI Resolution Processing Affects Image Quality
AI painting generators work by analyzing your input photo and applying a new artistic style to it. This process, often called 'style transfer,' involves deconstructing and rebuilding your image at a pixel level. If the AI model is trained on lower-resolution images or if the generation settings are optimized for speed over quality, the output can lose sharpness. The AI might struggle to interpret fine details, leading to a soft, out-of-focus appearance.
Common Photo Preparation Mistakes That Cause Blurriness
Often, the problem isn't the AI—it's the source material. Uploading a low-quality photo is the fastest way to get a blurry result. Common mistakes include:
- Using a small, low-resolution image: If your original photo is pixelated or small, the AI has very little data to work with.
- Starting with a blurry photo: An out-of-focus or motion-blurred photo will only become more distorted after AI processing.
- Over-compressing the image: Saving your photo as a heavily compressed JPG can create digital noise and artifacts that confuse the AI, resulting in a muddled output.
7 Proven Fixes for Crisp AI Paintings
Now that you know the common causes, let's explore the solutions. Here are seven proven tips to help you fix blurry AI art and consistently generate sharp, detailed masterpieces.
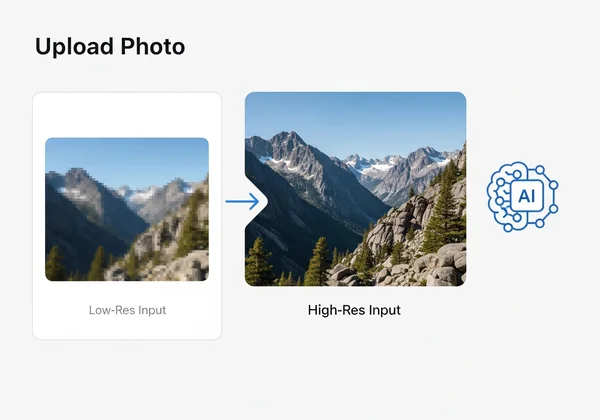
Fix #1 - Optimize Your Photo Resolution Before Uploading
The single most effective way to improve your AI painting's clarity is to start with a high-quality source image. Before you upload your photo to an AI art generator, make sure it is sharp, well-lit, and has a decent resolution. A good rule of thumb is to use an image that is at least 1080 pixels on its shortest side. A larger, clearer photo provides the AI with more data, allowing it to render fine details accurately.
Fix #2 - Choose the Right Aspect Ratio for Your Subject
Aspect ratio—the proportional relationship between an image's width and height—matters more than you might think. Many AI generators, like AIPainting.io, offer standard options like 1:1 (square), 2:3 (portrait), and 16:9 (landscape). Choosing an aspect ratio that matches your source photo prevents the AI from having to crop or stretch your image, which can cause distortion and reduce quality. For example, use a 2:3 ratio for a vertical portrait and a 16:9 ratio for a wide landscape shot.
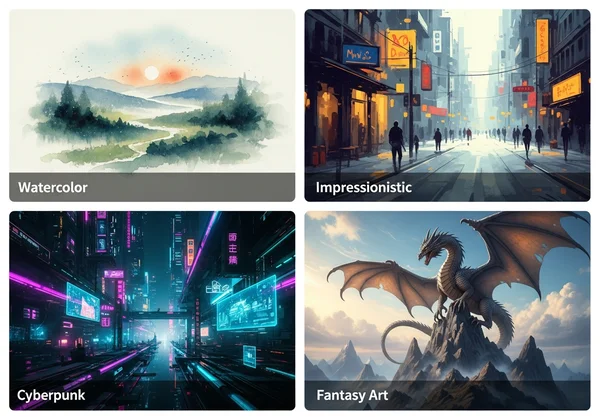
Fix #3 - Select Compatible Art Styles for Sharp Results
Not all art styles are created equal when it comes to sharpness. Styles like watercolor or impressionistic oil painting are inherently softer and more abstract. If you apply these styles to a photo that requires fine detail (like a group portrait), the result might appear blurry by design. While this might be desirable for certain artistic effects, it's not ideal when you're aiming for sharp clarity.
For crisp results, choose styles known for defined lines and sharp details, such as Fantasy Art, Cyberpunk, or even the Ghibli style. Experiment with different styles to see which ones best complement your subject matter and your goal for clarity.
Fix #4 - Adjust Settings to Reduce Digital Artifacts
Some AI painting tools offer advanced settings that can influence the final output quality. While AIPainting.io focuses on a simple user experience, other platforms might have sliders for "denoising" or "style intensity." If available, slightly reducing the style intensity can sometimes help preserve more of the original photo's sharpness. Be careful not to reduce it too much, or you will lose the artistic effect.
Fix #5 - Batch Processing vs. Single Generation for Quality
When you need to create multiple images, it can be tempting to use a batch processing feature. However, generating images one by one often yields better quality. Single generation allows you to focus on optimizing the settings for each specific photo. This individual attention ensures that every piece of art you create meets your quality standards, avoiding the one-size-fits-all compromises that can happen with batch jobs.
Fix #6 - Post-Processing Techniques to Enhance Clarity
Your work isn't finished once the AI generates the image. You can use simple post-processing techniques to add a final touch of sharpness. Free online tools or desktop software like GIMP or Photoshop have a "Sharpen" filter that can make a huge difference. Apply it subtly—a little goes a long way. This step can enhance details and make your AI painting look more professional and polished.
Fix #7 - When to Upgrade to HD/Ultra HD Generation
Many AI art platforms offer a standard, free generation tier and a premium high-definition (HD or Ultra HD) option. If you’ve tried all the tips above and still need more detail for professional use or large prints, upgrading is the best solution. HD generation uses more powerful AI models and processing time to create images with significantly higher resolution and clarity, free from the compression artifacts found in standard outputs. This is the ultimate way to ensure your art is crisp and print-ready.
Testing Your Results: A Quality Checklist
How can you be sure your adjustments are working? Use a simple checklist to evaluate the quality of your AI-generated paintings.
What to Look For in a High-Quality AI Painting
A great AI painting has more than just a cool style. Zoom in and look for these key indicators of quality:
- Crisp Edges: The lines defining the main subjects should be clear, not fuzzy or bleeding into the background.
- Fine Detail: Can you see textures, facial features, or small background elements clearly?
- Absence of Artifacts: Look for strange, blocky patterns or digital noise, especially in flat areas of color.
- Coherent Textures: The artistic texture (like brushstrokes or canvas grain) should look intentional and consistent across the image.
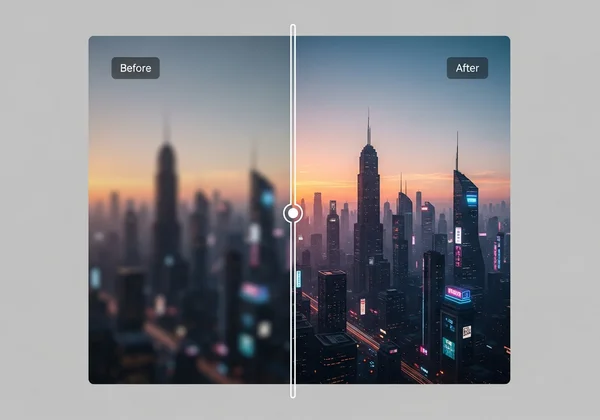
Side-by-Side Comparison Techniques
One of the best ways to test your improvements is to compare results. AIPainting.io features a convenient before-and-after slider that lets you instantly see the transformation. You can also generate the same photo using different settings or styles and open them in separate browser tabs. Toggling between them will make it easy to spot which version has superior sharpness and detail.
Your Path to Professional-Quality AI Art
Transform your AI artwork from blurry to brilliant—it's all about mastering the right techniques. By starting with a high-quality photo, choosing the right settings, and applying a few simple techniques, you can overcome the frustration of blurry results for good. Remember the key takeaways:
- Start with a great photo: High-resolution, in-focus images are the foundation of sharp AI art.
- Match your settings to your subject: Use the correct aspect ratio and an art style that complements your photo's details.
- Refine and enhance: Use post-processing and consider HD options for professional-level clarity.
Ready to transform your blurry AI creations into stunning masterpieces? These tips will put you in control of your artistic vision. The next step is to put these tips into practice. Head over to AIPainting.io to upload your best photo, choose a style, and see just how sharp and beautiful your AI-generated masterpiece can be.
Frequently Asked Questions About AI Art Quality
Why do some AI art generators produce blurrier results than others?
The quality difference often comes down to the underlying AI model, the resolution it was trained on, and the server resources allocated for generation. Platforms focused on speed may compress outputs more, leading to blurriness. High-quality generators like the one at AIPainting.io prioritize a balance of speed and visual fidelity.
Can I fix a blurry AI painting after it's been generated?
Yes, to an extent. Using post-processing software to apply a sharpening filter can improve clarity. However, this cannot recover details that were lost during the generation process. It's always best to follow the tips in this guide to get a sharp image directly from the AI.
What file formats work best for high-quality AI art generation?
For uploading your source photo, high-quality JPG or PNG files are ideal. PNG is a lossless format, which means it preserves all the original image data without compression, making it a superior choice for photos with fine details. WEBP is another excellent, modern format.
How much does HD generation cost on AI painting platforms?
Pricing varies between platforms. Many services operate on a credit system or a subscription model for premium features like HD and Ultra HD generation. Always check the platform’s pricing page for the most current information on costs for high-resolution outputs.
Are there types of photos that never work well for AI painting?
Photos that are extremely low-resolution, out of focus, or have very complex, "busy" patterns can be challenging for any AI. The AI may struggle to distinguish the main subject from the background, resulting in a chaotic or blurry image. Simple, well-composed photos with a clear subject tend to produce the best results.